Categories
house living green

Starting a Compost Pile in the Winter

At the start of the winter I wrote about how you can keep adding to your compost pile during the winter. The important factor in maintaining a winter compost pile is to keep it covered so that all your hungry neighborhood critters didn’t make a mess of it while foraging for food.

While we have a covered compost pile to add to at our apartment complex, I couldn’t wait to start our own compost pile now that we have a yard and our own soil to start enriching. But a snow covered yard and below freezing temperatures don’t lend themselves well to building a multi-pile compost system out of pallets or what have you. And building a loose pile is just inviting the rabbits and deer to move into our backyard. So I needed a contained solution. A few quick searches on craigslist led me to some very cheap 55 gallon steel drums for sale at a neighborhood farm. There was actually a range of drums to be had on craigslist– from shiny and painted, to food grade plastic, to older and slightly rusty. I went for steel as opposed to plastic, unpainted, and slightly rusty, but with no holes, and with the top removed.

The drum is about 3 feet tall, and I’m keeping it roughly where our future multi-pile system will go – behind our garage. But it’s pulled out a few feet from the wall of the garage in the hopes that being removed from anything climb-able will deter animals from trying to climb into the bin. The drum is heavy enough that I think it would probably take a few raccoons working together to knock the thing over.

Now that I have a sturdy container, the next step is to build the pile. I don’t expect to build a big enough pile this winter to generate any heat and break anything down in my compost pile this winter, but I want to have a good start for when the temperature start warming up in the spring. I also want to even further prevent my compost from attracting animals by keeping it full of “brown” or carbon-rich materials. These materials will help keep the pile from developing an odor on the days when the temperature gets above freezing and the food scraps thaw out a bit. Good “brown” compost materials for starting a winter pile are shredded or torn newspapers, shredded or torn brown paper bags, and/or torn apart cardboard egg cartons. If you happen to have any dried leaves from the fall still around, those would work well too. Aim for at least 50% brown items in your winter compost pile.

So there you have it: Starting a compost pile in the winter

  1. A container that is difficult for animals to get into
  2. Plenty of “brown” compost materials
  3. Your kitchen scraps

 That’s it. So what are you waiting for? Get to composting!

Want to read more about compost? Check out these previous posts:

On Apartment Composting
Can I Compost That?

Categories
energy house living green

Introducing The Energy Efficiency Project

Once upon a time, husby and I thought, what if we bought a house in the small town we’ll be moving to this spring. About a year ago, when I first starting envisioning this whole building earth project, I thought a good progression would be to have a house to demonstrate some of the energy efficiency, green building, and sustainable design ideas that I’ve been writing about. Not to mention we were ready to start investing in our own place inside and out.

One of the projects that I’m super excited about starting in regards to our new house is this series on The Energy Efficiency Project. Each month I’m going to explain what things we’ve done to reduce our houses energy use: upgrades, downgrades, or behavior changes. And then I’ll share the nitty-gritty with you: our monthly energy bill, and the costs, and pros and cons of the changes we’ve implemented. My goal is to be as transparent as possible in how we use energy and how we are attempting to save energy. My hope is to show how small changes can add up to significant energy savings, and maybe you’ll be inspired to adopt some of the same changes yourself.

power lines: the energy efficiency project

So first, let me share some details about our new home to give you the lay of the energy use land.

Size: 1,026 square feet. Single story, with an unfinished basement, rafter attic for insulation.
Energy using appliances: refrigerator, stove, washer, dryer, hot water heater, gas furnace, central air, garage door, coffee grinder, exhaust fan
Electronics: computer, cell phones, alarm clock, seedling starter heating pad
Light fixtures: 21 bulbs worth
Windows: approximately 100 square feet, most of which are fairly new with aluminum sills
Insulation: I’m not sure exactly, since I haven’t looked inside the walls yet, but I’m pretty sure it’s just your basic fiberglass batts. The attic has about 3-4 inches of blown insulation covering the house.
Occupants: 2 adults, one wee tender babe

The Energy Efficiency Project: Month 1

We’ve been living in the new house for about a month now. Long enough to get our first energy bill! So we have a bit of a baseline to start with.

For December 17th through January 13th this is what our energy usage looked like:

Over 27 days we used 379 KWH (kilowatt hours) of electricity. We are part of the Alliant Energy Second Nature renewable energy program, at the 100% level. (In this program you can choose the amount of your energy use that you want to be matched in renewables, and we chose 100%.) So the cost of our electricity is $0.13 per KWH, for a total of $49.62.

We also used 85 Therms of natural gas heat energy. The natural gas market fluctuates in Wisconsin, so there is not an easy dollar per Therm number to give you, but during this billing period we paid $72.90 for our gas use.

Our energy bill also provides these numbers for helpful comparison:

Electricity used this month last year: 834 KWH (!!! what did the former owners have plugged in that sucked more than twice as much electricity as we used?)

Gas used this month last year: 96 Therms. Average temperature this month: 20° F. This month last year: 14° F. So last year was a bit colder than this year which explains the higher gas usage.

Degree Days this month: 1211, vs this month last year: 1698. Degree days are the number of degrees below 65° F in one day, all added together for the total 27 days of the billing period

Now let’s see where we can go from here!

P.S. Interested in seeing a picture tour of our new house? You can check that out over on macnamania.com!

Categories
building energy living green

Happy 2015

Happy 2015Happy 2015!

How’s it feeling now that you’ve had a week to break it in?

Let’s start this year off with a bang: We bought a house!  Due to job related circumstances we will only be living in the house part time between now and June, and we will spend the rest of our time in our current apartment. This will provide us with plenty of time to get some updates and projects done before we move in for good this summer.

Now you might be wondering, what does this house have to do with this little blog? Well, it means that as we do house renovation projects, I’ll have plenty of opportunity to share with you all of those green building home renovation projects, like:

  • What are the most earth friendly paints, stains, and adhesives to use?
  • Which are the most sustainable flooring materials?
  • How do you go from lawn to organic garden (hopefully without your neighbors giving you the side-eye)?

Another blog series that I have in the works is on making a house more energy efficient. I’ll take a look at the energy usage of this house, and similar sized houses in the neighborhood, and do monthly updates on what we have done to bring that energy use down.

Aside from the house, in 2015 I’ll be continuing the series on “green” certifications in the construction and home furnishing areas. I’ll also continue to explore passive house design, integrative design, green living habits, and compost.

If there is anything you’d like to see in the upcoming year, be sure to leave a comment or drop me email.

I know I’m excited for everything that 2015 has to bring! I hope your new year is starting out shiny and bright and not too cold!

Categories
living green

5 Tips to have a Greener Holiday Season

greener holiday seasonDuring a season dedicated to gatherings, gifts, and baked goods, I’d like to offer some simple ways you can reduce your footprint and have a greener holiday season.

Decorations

  • Upgrade to LED holiday light strings. They may cost a bit more up front, but they’ll save you plenty in electricity use, and will last forever. As LED technology grows, you can now find strings that have that desirable yellow-white light rather than just the blueish white that you may associate with LED holiday lights. (Although I happen to think that the blueish white strings are spectacular for outdoor decorating.) Plus, no more half burnt out strings of lights.

Presents

  • Wrap your presents in recycled paper – either from the store, or make your own using grocery bags or cloth. Or reuse gift bags that you’ve received in years past. Keep in mind that tissue paper is not recycleable, so if you receive a gift wrapped with tissue paper, try to resuse it in your own wrapping in the future.
  • Giving American made gifts not only supports our economy, but it also reduces that energy required to transport products from factory to store. Better yet, look for gifts that are made within your own community, or give experiences like dinners out, theater or sporting event tickets, or museum and zoo memberships.

Cooking and Baking

  • If you’re going to be spending all day in the kitchen doing a marathon baking session, turn the thermostat down a few degrees – the kitchen will still be toasty warm from the heat of the oven!
  • Americans throw out huge amounts of food waste every day. You can help reduce that by thinking through your holiday menu plan and carefully considering how much food to make. Try not to make more than will get eaten during the meal or as left overs. And remember that you can keep adding to your compost pile all winter long rather than throwing out your kitchen scraps.

And with that, have a Merry Christmas, Happy Hanukkah, Happy Kwanza, and Happy New Year. I’ll be back with more posts after the New Year.

Categories
apartment living energy living green

Hang Drying Laundry in the Winter

Clothes dryers are an incredibly inefficient use of electricity. The typical dryer uses in the neighborhood of 5 kWhs of electricity, even energy efficient dryers use at best around 2 kWhs during their dry cycle. (To put that in some perspective, that’s the same amount of energy as a 100 watt incandescent bulb uses in 20 hours – or in the case of my 9 watt LED light bulbs, 220 hours!) In fact, running a clothes dryer uses more energy than any other appliance in a typical American household. That’s a lot of energy just to spin some hot air around.

These days, what with cloth diapering Cheeks McGee, I’m doing a load of laundry about every other day – 4 loads a week, we’ll say. And living in an apartment, we pay $1.50 for each cycle. Which means that if we were drying all of those loads, it would tack an additional $24 onto our expenses each month. That’s $312 a year.

So in the interest of saving energy and money, we hang dry our clothes. As I’ve written about before, in the summer heat and sun, our laundry is dry within a few hours. Now that the winter has firmly decided it’s here, we continue to hang dry our laundry, but now we hang it indoors. The shared basement laundry room in our apartment complex already had clothes lines, but in the past we’ve used a folding drying rack, the backs of chairs, the shower curtain rod, and basically anywhere else we could possibly hang a piece of clothing. It does take more than 3 hours for our laundry to be dry, but never longer than 24 hours. I bet aside from sweatshirts, most of it would be dry by morning if they hung over night. And running your clothing through the spin cycle can be really hard on it, so by hang drying we get more life out of our clothing as well.

Yes, we have to think ahead more than 2 hours if we want to wear something that is currently dirty. But right now, with the frequency we are doing laundry, that hasn’t been an issue. And in a clothing emergency, the dryer is still right there.

Categories
living green

The Winter Compost Pile

winter compost pileMuch like it often happens in the fall, it seems like we went from comfortable-with-a-sweatshirt weather to need-all-the-layers weather overnight. And to top it all off, we have a layer of snow on the ground. Oh, November, you’re full of surprises.

With the change in weather, you might be thinking that it’s time to put the compost pile to rest. However, with a cold weather adjustment or two you can continue to build that pile all winter long. First, let’s look at what might be happening in that pile.

Small Winter Compost Piles (less than 1 cubic meter)

If you have just a small pile, the soil making microbes might take a break during the cold weather. But the cold weather will also freeze – or at least preserve – the pile and anything you add to it, helping to keep the pile from developing an odor. When the pile thaws out in the spring be sure to add a good amount of “brown” carbon-rich materials to prevent odors while the microbes move back in. Since you’ve been feeding the pile all winter, those soil friendly microbes and earthworms will quickly move back in to your pile since it will be providing a bountiful feast for the little guys.

Larger Winter Compost Piles (greater than 1 cubic meter)

One of the great things about larger compost piles is that they generate enough heat in the center of the pile to keep those microbes alive and working. This means that you can feed and even turn the pile throughout the winter, and come spring you will be a bit further ahead in having some finished compost to add to your garden beds.

Winterizing your compost pile

Since the winter tends to be a leaner season for all those backyard and neighborhood critters, they tend to be on the lookout for any easy sources of food. If you don’t want your backyard to become the compost pile buffet, you may have to get creative with locking up your pile. Our current pile is contained in a bin with a twist-locking lid. The bin has ventilation built in, but the locking lid keeps birds, squirrels, coons, and neighborhood cats out. If you have an pallet bin, you may want to make a screen lid for it that can either be locked down or weighted down. If you have a loose pile, consider covering the pile with a tarp for the winter – just give yourself a point of easy access before the snow comes down if you want to keep feeding the pile during the winter.

winterize your compost pile with a lid or cover


Interested in catching up on other compost topics? Check out these posts:
On Apartment Composting
Can I Compost That?
Happy Composting!

Categories
living green

Midterm elections

Just putting out a little public service announcement that midterm elections are quickly approaching. Don’t forget to exercise your right to vote! Even though it’s not a presidential election year, doesn’t mean these races aren’t important to how policy will be shaped in the coming years.

If you’re interested, EcoWatch put together a list of the top 20 officeholders running for re-election based on their acceptance of “Dirty” money from big oil, big coal, etc. Make sure your candidate is supporting renewable energy – both in word and in action.

In December, the National Journal pointed out 8 key races to watch as well from an environmental standpoint.

**UPDATE**

Only One Climate allows you to search for the midterm election candidates in your specific district to find out their stance on climate change legislation.

Categories
living green

How to take a greener road trip

greener road trip
“rushing” by Robert S. Donovan // CCBY


My family and I just returned home from a week of vacation, during which we took a road trip from Madison to Detroit. Road tripping might not be the greenest way to spend our vacation, but often it’s the transportation method that makes the most sense for our family. So I wanted to offer some tips for how you can use less energy on your next road trip.

Prepare your car

Cars run more efficiently when they are properly maintained, so go in and get your oil changed before you head out on your road trip. You can get a high efficiency oil filter that will help you get the best gas mileage during your drive. While you’re at it make sure your tires still have good tread and are properly inflated. Proper tire pressure will not only give you better gas mileage, but are also safer to drive on.

Pack lightly

A heavy car is going to need more gas to get around, so if you can lighten up your luggage, you’ll help gain some of those MPGs. I’m learning that this can certainly be difficult with a child in the picture. Turns out we didn’t even use the stroller on this vacation, we got along just fine with just a baby wearing carrier. Next time, unless we have specific plans, we’ll leave the stroller at home.

Check your route

Going from Madison to Detroit  we need to pass through Chicago, which seems to always mean getting stuck in traffic for at least a little bit. But it turns out that the optimal speed for gas mileage is somewhere between 50 – 60 miles per hour. On our way home, we saved ourselves the possible stop and go of the city and took one of the by-pass highways. We may have put a few more miles on the car, but we were able to skip the idling in traffic.

Drive smart

Not only does getting better gas mileage save you money at the pump, it also means you are releasing fewer lbs of carbon dioxide into the atmosphere with each trip. Once you’re on the road you can help increase those MPGs by using the windows instead of the air conditioner when you’re on city streets, but switching to AC with the windows rolled up once you hit about 50 miles per hour. Keeping a safe space between you and the car ahead of you not only gives you time to react to traffic, but also means you won’t necessarily be making quick stops, which can also burn up fuel.

Pack your own snacks

Gas station and rest stop food tends to be over packaged among other things. Packing your own snacks helps prevent waste, and gives you more options for road friendly food than the typical rest stop. We like to also bring a water bottle or two – for long trips we refill them at the rest stop drinking fountain.

Hopefully this list gave you a new idea or two about how you can make your next road trip a little greener.

Categories
living green

Things making me go wtf this week

The Joy Cardin show on Wisconsin Public Radio had a local meteorologist as a guest on Friday morning to talk about the changing season and what sorts of weather to expect this fall and winter.  A guest called in asking if global warming is really caused by humans (insert massive eye roll and side eye here), and the meteorologist dodged the question by saying he didn’t think there was enough scientific knowledge yet to decide one way or another. He also said that he thought it would take us 50 to 100 years to make a decisive scientific verdict on the question. When people called in to continue  the discussion (and presumably to correct this man’s view of where the science stands) Joy stated that the purpose of the show was to talk about the weather, the season changing, and what to expect for this years winter, and they would not be taking call-ins regarding climate change. She then let the meteorologist re-state his dodgy stance that we just don’t know yet, we don’t have the science yet.

I had to change the radio station a couple times during this drivel because I was driving and I could feel my blood pressure sky rocketing as I rage-listened to this meteorologist.

It turns out that the this meteorologist’s view point is not uncommon among meteorologists. So here is an important public service announcement: Meteorologists are not climate scientists. They are NOT EXPERTS IN THE FIELD OF CLIMATE SCIENCE.

The Joy Cardin show was followed by NPR’s On Point, during which Tom Ashbrook covered the recent report showing that CO2 numbers in the atmosphere are soaring at a record rate.

Can we please stop giving climate change deniers a public platform? The science has shown every time that rising CO2 levels in the atmosphere are causing global warming, and the rate that CO2 levels have risen since the industrial revolution is unprecedented. This isn’t a question anymore, folks. Shouldn’t this meteorologist have been vetted on the subject before hand? Joy Cardin’s producers couldn’t have honestly thought that if they had a meteorologist on the show the subject of climate change wouldn’t come up, could they?

And now, to make me feel a little bit better about this whole thing: Who’s a Climate Scientist?

Categories
energy living green

LED Light Bulbs

I hope you all had a lovely long weekend. Between the Holiday and adjusting to the ever changing schedule that is medical residency, Tuesday’s post got away from me. I hope you didn’t miss my wrap up on light bulbs too much. 

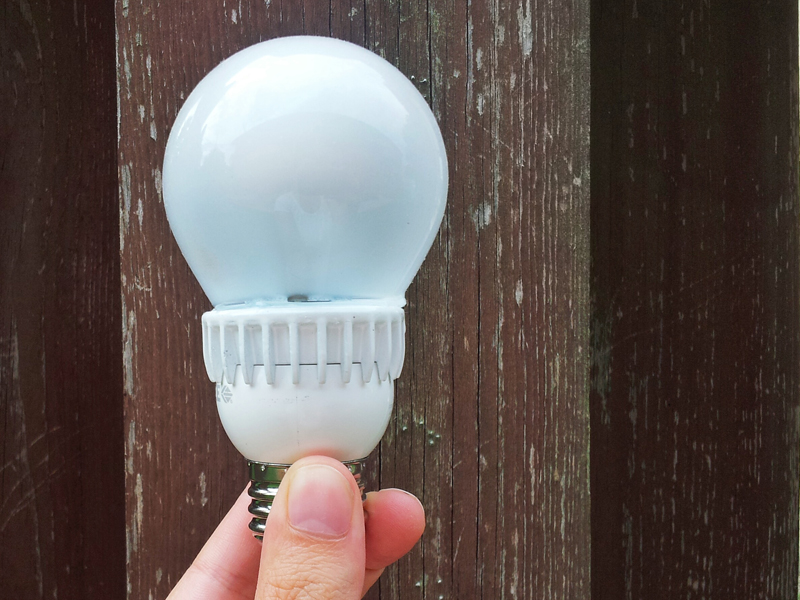
LED Light BulbLED stands for Light Emitting Diode. LEDs are comprised of a semiconductor material and two leads. Basically what happens is that when the LED is connected to a circuit, a voltage is applied to the leads. This provides enough energy for electrons to jump across the band gap, and when they do, they release energy in the form of photons, or light. The color of light emitted by the LED is determined by the band gap in the semiconductor. If all this talk of semiconductors sounds vaguely familiar, it’s because it’s the same concept behind solar cells. Only in this case, the energy is coming from the wall rather than from the sun. LEDs are great as far as energy efficiency goes because they require a very small amount of electricity to produce light. They are also compact, robust, and have long lifetimes. LED light bulbs are made up of a collection of LEDs designed such that they emit a white, or slightly yellow light. Recently LED light bulbs have become increasingly available for home lighting, so let’s see how they compare to Incandescent and CFL light bulbs.

  • Light Quality: Mixed Reviews. Like CFLs I have frequently read reviews that LED light bulbs produce light that is too cold. We can probably all easily identify LED holiday lights because they have that tell-tale blue tinge to the light. I am happy to report that the LED light bulbs that I recently purchased produce a warm soft light, just like we expect are accustomed to seeing from incandescents. LED light bulbs will probably need to become more mainstream before they beat the cold blue light rap.
  • Price per bulb: Con. Standard LED light bulbs typically run $10 a bulb. If you buy them in a six-pack you can get them for more like $9, but there is definitely a bit of sticker shock that comes with spending over $50 on lightbulbs just for your home use. And if you want anything fancy, like a dim-able bulb, you’ll easily be paying double.
  • Availability: Pro. You may not be able to find LED light bulbs on the shelves of your local grocery store yet, but Target, Home Depot, and Amazon all carry them, and I imagine many other stores as well.
  • Style: Con. Similar to CFLs, LED light bulbs fit standard sockets, but the choice of bulb is limited. There are candelabra bulbs, but they don’t look the same as the incandescent equivalent.
  • Energy use: Pro. An LEDbulb that produces a comparable amount of lumens as a 60 watt filament bulb requires only 9 watts.
  • Lifetime: Pro. 25,000 hours! You read that right, a LED bulb will last more than 3 times as long as a CFL bulb. That translates into nearly 23 years of light at 3 hours a day. The LED light bulb that I recently put in our lamp will burn for longer than my youngest brother has been alive. That’s crazy town.

And bonus: LED light bulbs contain mostly recycle-able materials. Contact your local recycling provider to see if they can recycle your old bulbs. Although, you can probably wait 20 years  or so before you have to deal with that.

So the tally when comparing LEDs to CFLs and Incandescents is 3 pros, 2 cons, and 1 mixed review. Now let’s look at the long term cost.

10 year cost for burning filament bulbs in one lamp: (3 hours a day, $0.12/kwh cost of electricity, $9.00/bulb, 1 bulb) = $20.83.

And bonus: that same bulb will burn for another 13 years at that rate.

Pretty cheap when compared to the $96.84 it would cost to run the same light with a incandescent bulb, and it even beats out the $22.40 for the CFL. 

And more importantly, over that same 10 years you could save 550 kWh of electricity if you switch from an incandescent light bulb, or 55 kWh if you switch from a CFL.